So, a few days ago, I saw a video showing a password creation form.
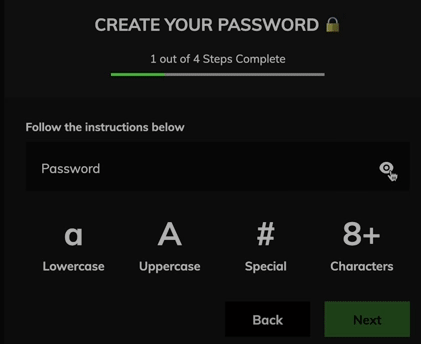
Each time the user types anything, there is an instant validation with icons indicating which constraint is fulfilled.
I thought it was a nice way to give instant feedback to the user. But can I reproduce this behavior using Svelte ? Let’s see !
First, let us set up a new Svelte project using esbuild. You can follow instructions
in my post Set up a Svelte project using ESBuild
We’ll start with one rule : the password length is 8 characters minimum. This
way, we can “feel” how we can solve the problem for all the controls, setup all
needed elements, without having too much in our plate. Change the app.svelte
file as below :
 1<svelte:options customElement="app-input" />
 2
 3<script>
 4let pass = "";
 5let validLength = false;
 6
 7function check() {
 8   validLength = (pass.length >= 8);
 9}
10$: check(pass);
11</script>
12
13<input bind:value={pass} type="password">
14<span class:valid={validLength}> 8+ </span>
15
16<style>
17.valid {background-color: green;}
18</style>
If we try this, we can see that nothing happens if we type a password until it
reaches 8 characters length : then the 8+ background changes to green !
Let’s review the code to understand what is happening here.
In the script section, we start by declaring two variables :
pass will contain the user input
validLength will indicate if the length rule is respected or not
Then, we define the check function : a straight forward validation of the
password length.
The next line is more interesting. We use the $: directive to monitor any
change to the password and check its validity.
1$: check(pass);
So now, every time the variable pass is changed, Svelte will invoke the
check function.
Below the script section, we define the HTML part by declaring the input field.
It will be automatically bound to the pass variable.
1<input bind:value={pass} type="password">
So, when the user enters characters in the input field, Svelte takes care of
updating the pass variable.
In Svelte, we can also bind a CSS class to an element. Here, the span tag will
be assigned the CSS class valid only if the validLengh variable is true.
1<span class:valid={validLength}> 8+ </span>
The valid class is defined in the style section : just a green background.
1.valid {background-color: green;}
This is roughly all we need : the mechanism to live check the password for every keystroke and changing dynamically the style. So for the other controls, we’ll apply the same logic.
To check if the password contains lower and upper case characters, we’ll
declare a new variable validCase :
1let validCase = false;
Then we’ll add the HTML part :
1<span class:valid={validCase}> a..Z </span>
Finally, we’ll complete our check function to add the control :
1validCase = pass.toUpperCase() != pass && pass.toLowerCase() != pass;
The trick here is to compare the password to its upper and lower case versions. The control fails if it is the same as one of them.
OK, for the last control, the presence of a special character, we’ll add this HTML :
1<span class:valid={validSpecial}>~&#</span>
And we’ll apply a regular expression in the check function :
1validSpecial = pass.replaceAll(/\w/g, "").length > 0;
This will remove all non-special characters and if it remains something, then there is at least one special character.
That is all, folks ! We have now a complete password creation form with live checking controls and instant feedback, with Svelte in one web component !
You can find the complete code in my repo Tutorial Svelte Password.